PRECOLLET LOGO
facebook white ico
whatsapp white ico
youtube white ico
instagram white ico

[What We Do] [Technical FAQs]

info@precollet.com

SERVICE
BE A DISTRIBUTOR
COMPANY
MACHINE REFERENCE
PRODUCTS
  • COLLET
    • Dead Length Collet
    • Extended Nose Collet
    • Draw in Collet (OD Thread)
    • Emergency Collet
    • Overgrip Collet
    • Collet More Detail
  • GUIDE BUSH
    • Adjust Carbide Guide Bush(Drawn)
    • Reinforced Shank Guide Bush
    • Bushing More Detail
  • SWISS LATHE TOOLING
    • Accessories
    • Tool Holders
    • ER Collet
  • BAR FEEDER ACCESSORIES
    • Finger Chuck
    • Pin Type Finger Collet
    • Revolving Ends
    • Channel
    • Other Accessories
  • CUTTING TOOL
    • Drill Bits
    • Taps
    • Inserts
    • Thread Mills
    • End Mills
    • Micro Bore Tools
  • CITIZEN
  • TSUGAMI
  • STAR
  • TORNOS
  • KSI
  • EGURO
  • MAIER
  • JINN FA
ABOUT US BLOG
  • CONTACT
  • CATALOG
  • HELPFUL BLANK
  • TECHNICAL INFOR
PRECOLLET LOGO
MENU
Home
PRODUCTS
  • COLLET
    • Dead Length Collet
    • Extended Nose Collet
    • Draw in Collet (OD Thread)
    • Emergency Collet
    • Overgrip Collet
    • Collet More Detail
  • GUIDE BUSH
    • Adjust Carbide Guide Bush(Drawn)
    • Reinforced Shank Guide Bush
    • Bushing More Detail
  • SWISS LATHE TOOLING
    • Accessories
    • Tool Holders
    • ER Collet
  • BAR FEEDER ACCESSORIES
    • Finger Chuck
    • Pin Type Finger Collet
    • Revolving Ends
    • Channel
    • Other Accessories
  • CUTTING TOOL
    • Drill Bits
    • Taps
    • Inserts
    • Thread Mills
    • End Mills
    • Micro Bore Tools
MACHINE REFERENCE
  • CITIZEN
  • TSUGAMI
  • STAR
  • TORNOS
  • KSI
  • EGURO
  • MAIER
  • JINN FA
COMPANY
ABOUT US BLOG
BE A DISTRIBUTOR
SERVICE
  • CONTACT
  • CATALOG
  • HELPFUL BLANK
  • TECHNICAL INFOR

How to Properly Install Your Main Collet into a Swiss Sliding Head Lathe

swiss-lathe-holding-system-set

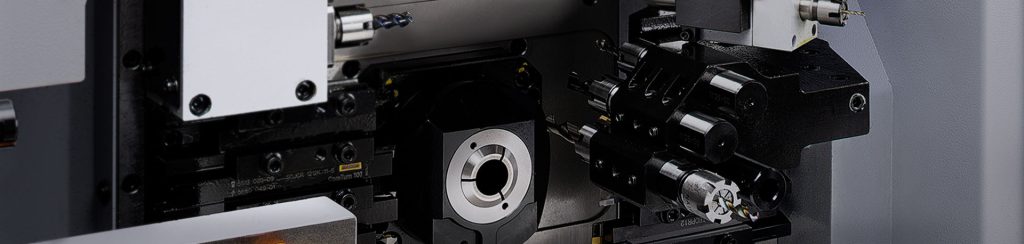
Correctly installing the main collet in your Swiss-type lathe is essential for machining precision, workpiece quality, and machine safety. A poorly installed collet can lead to runout, loose components, or even serious machine damage.

This guide walks you through a proven, step-by-step installation process.


Tools & accessories You Will Need

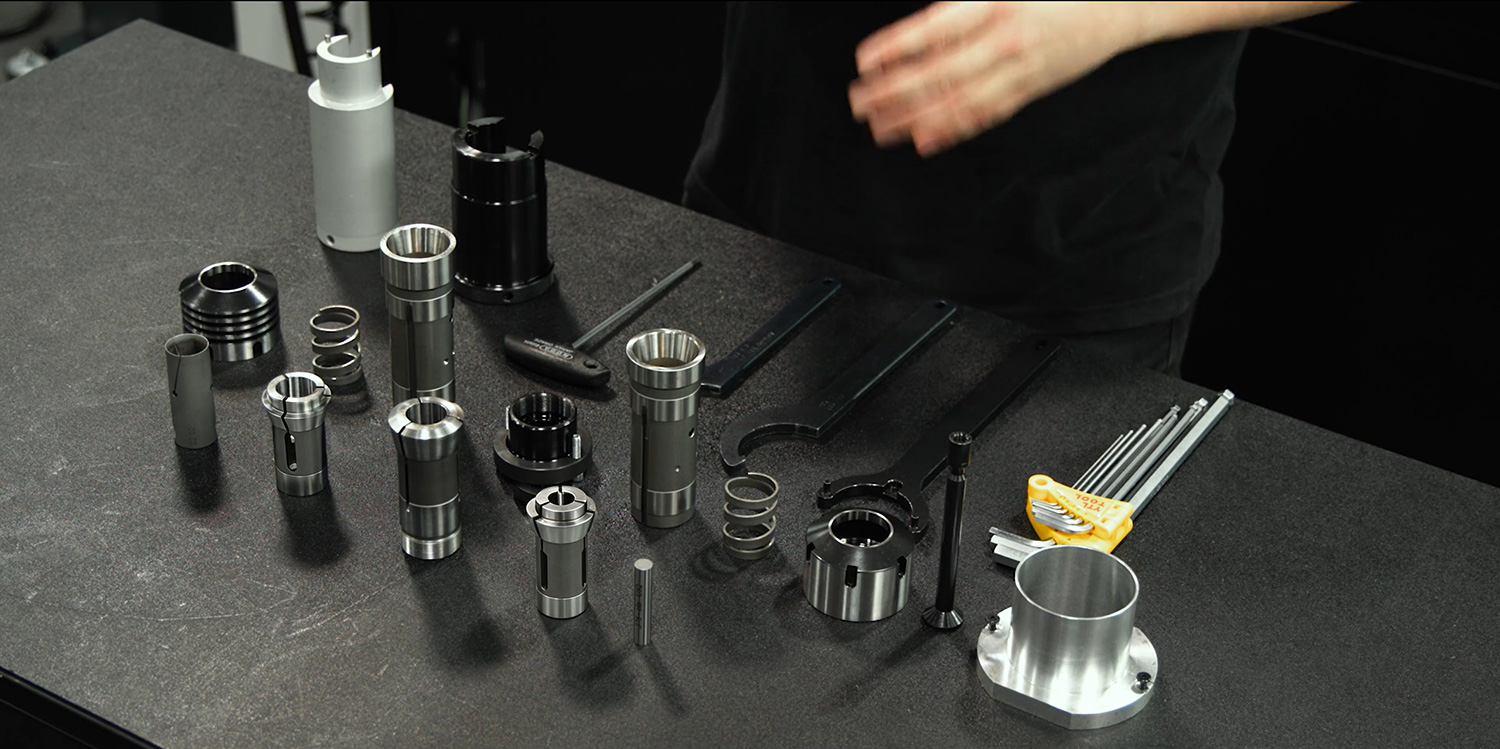
Before starting, ensure you have the following parts and tools ready:

  • [Main Spindle Collet] – the workholding element
  • [Main Spindle Collet Sleeve Assembly] – collet spring, brass sleeve, and sleeve body
  • [Main Spindle Cap (Nut)] – secures the entire assembly
  • [Spanner Wrenches] – one larger for the cap, one smaller for the collet neck

These are all critical components. Using high-quality parts directly affects installation success and machining stability.


Step-by-Step Installation Process

Step 1: Prepare the Machine & Create Working Space

Move the control unit out of the way and open the machine door.

Switch to Handle mode and select the Z1 axis. Jog the main spindle positively until you reach the over-travel limit. This pulls the spindle as far back as possible, giving you maximum room to work inside the machine.


Step 2: Inspect and Clean the Main Spindle Cap

Take your [Main Spindle Cap] and inspect the inner ring surface.

⚠️ This is a critical step.
The cap surface and the spindle face bottom out against each other when tightened. If any dirt, chips, or old grease remains on these surfaces, the cap can slowly work itself loose during machine operation. This can cause catastrophic damage to the machine.

✅ Action: Thoroughly clean the inner ring surface of the cap and the corresponding face on the spindle. Both must be perfectly clean before assembly.


Step 3: Prepare the Collet Sleeve Assembly

Take your [Main Spindle Collet Sleeve Assembly] . If your sleeve assembly consists of multiple parts (spring, brass sleeve, and steel body), ensure they are correctly seated. The brass sleeve should move smoothly within the steel body.

💡 Pro Tip: A clean, well-lubricated brass sleeve reduces friction and ensures consistent collet operation.


Step 4: Ensure the Collet Is in the OPEN Position

This step is often overlooked but is extremely important.

If your [Main Spindle Collet] is in the closed position, attempting to tighten the cap will cause the collet to push against it. This creates unnecessary resistance and makes assembly significantly more difficult.

How to open the collet before assembly (on most Swiss lathes):

    1. Locate the dead man switch on the machine.
    2. Press and hold the dead man switch until the indicator light turns on.
    3. When the light is on, the main collet is OPEN.
    4. You can now release the switch.

✅ Only proceed to the next step when the collet is confirmed open.


Step 5: Install the Main Spindle Sleeve

Before inserting the [Main Spindle Collet Sleeve] , locate the alignment pin inside the spindle housing.

✅ Best Practice: Instead of trying to locate the alignment pin by feel, rotate the spindle housing until you can visually see the pin. Then, line up the slot on your sleeve with your line of sight and simply drop the sleeve in. This method is much easier and prevents frustration.


Step 6: Install the Cap and Hand-Tighten

Place the [Main Spindle Cap] over the collet and sleeve.

Hold the back of the spindle to prevent it from rotating. Push the cap in and hand-tighten it to engage the threads.


Step 7: Final Tightening with Spanner Wrenches

Take your two [Spanner Wrenches] .

    • Fit the smaller wrench on the neck of the collet.
    • Fit the larger wrench on the cap.

⚠️ Do not over-tighten.
The clean surfaces do the work, not extreme force. Over-tightening can cause the cap to seize, making it very difficult to remove later.

✅ Correct tightness: Apply moderate, firm pressure. You will feel the clean metal surfaces seat against each other. Go just a little bit more than “snug”. At this point, the cap will hold securely during normal machine operation.


Key Takeaways

  • Cleanliness is safety – A dirty cap seating surface is the primary cause of caps loosening during operation.
  • Open the collet first – Always open your collet before tightening the cap to avoid mechanical resistance.
  • Use the alignment pin visually – Align the sleeve slot visually with the spindle housing pin for easier installation.
  • Tighten with moderation – Firm but not excessive force is sufficient

For high-quality replacement main collets, collet sleeves, caps, and spanner wrenches, please refer to our product pages. Proper installation starts with the right components.

Share to:
  • Preview:
  • Next: PRECOLLET Announces UK Distribution Partnership with Eric & Colin

Product

  • Collets
  • Guide Bushing
  • Bar loader Accessories
  • Cutting tools

Services

  • Catalog
  • Contact us
  • Technical infor
  • Helpful blank

Blog

swiss collet Part No method

How to write PRECOLLET Part No when ordering

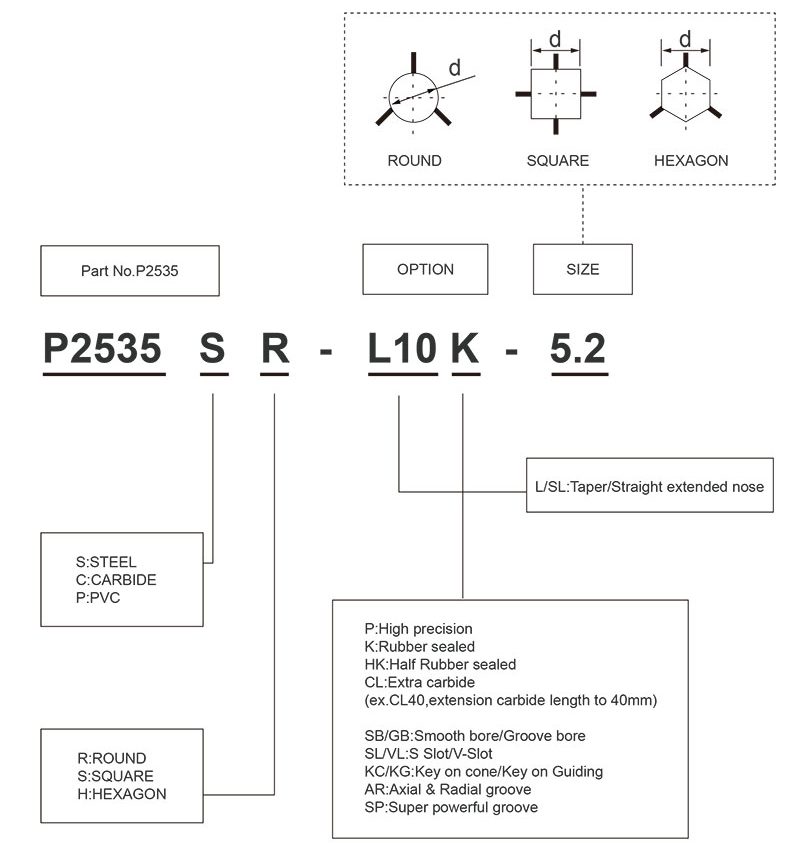
Pls check Part No written method as per...

spindle-clamping-system

How to Properly Install Your Main Collet into a Swiss Sliding Head Lathe

Correctly installing the main collet in your Swiss-type lathe is...

Get a Quote

TEL

+86 13798564763

Email

info@precollet.com

address

Room 39H-Y2, Fortune Building,Shenzhen, 518033, Guangdong, China

Follow us

facebook
IG
youtube ico
LinkedIn

©2023 Shenzhen Zeling Precision Industry Co., Ltd. All rights reserved

Privacy Policy

Email

info@precollet.com

W/app

+86 13798564763

Phone

+86 13798564763

Message
Leave a Message
Our dedicated team is waiting for your inquiry,
contact us anytime.
Name*
Email*
Message*
Submit
Email
W/app
Phone
Message